For quite some time, I’ve been interested in the concept of a tool-assisted speedrun. Some of you may remember the 11 minute speedrun of Super Mario Bros. 3 by Morimoto (もりもと) back over ten years ago. Recorded well before the gaming community at large was familiar with the concept, its unerring perfection left most people watching with a sense of awe. Not long after the spread of the video, the website NESVideos was founded. This site eventually became TASVideos.org, a pre-eminent website on creating such tool-assisted superplays. (Presumably “s” was changed from “speedrun” to “superplay” to show that some TASes can be used to show off feats other than speedruns.)
Something special that the TASVideos people cooked up in one of their superplays was what is now known as a Total Control play. Demonstrated with the famous Super Mario World and Pokémon Yellow plays, these Total Control plays actually exploit bugs within the games themselves to upload a new program onto the game console using only input from the controllers. As amazing a feat as this would be on its own, they took it a step further: they removed the emulator from the equation and substituted in a real console!
Referred to as “console verification”, a thread popped up on the TASVideos forums about replaying the controller input from TAS recordings back to physical hardware. Over the past few years, several people have put together console verifiers for a handful of platforms. Recently, these “TASBots” have been brought to Games Done Quick charity gaming events to be demonstrated between live speedruns. To me, the pièce de résistance of these TASBot runs involved not only gaining control over the game, Pokémon Red, but taking over the Super Game Boy shell that the game was running in as well. Although the means by which breaking out of the Game Boy’s shell and into the Super Nintendo was well documented (and in fact, some commercial games did), it got me wondering.
After the Super Nintendo and the Game Boy, which could interact using the Super Game Boy, Nintendo made the GameCube and the Game Boy Advance. One of the add-ons created for the GameCube was called the Game Boy Player, which could play Game Boy and Game Boy Advance games on a television by using the GameCube as video-out. But the Game Boy Player is not nearly as well documented as the Super Game Boy, so I looked into what it might take to get console verification working for the Game Boy Player.
My first approach involved snooping on GameCube controller input (JOY bus) data. I bought a set of four GameCube controller extension cables, and opened up one of them. The cables have five or six wires inside of them (in the case of only five, it means two ground wires are connected), and are supposed to be color coded. However, the extension cables I bought had the colors wrong, so I spent a fair bit of time trying to figure out which wire was actually which. In my case, the red one wound up being ground and the white one was data, which is backwards from the official cables.
Upon hooking up the controller to the logic analyzer, I discovered that the JOY bus was being polled for input roughly 18 times per frame. A visualization of this is below. The reasoning behind polling this frequently is still beyond me. Dealing with 18 input frames per video frame wouldn’t be hard to deal with. However, what was a much larger problem was the fact that it appeared that the video frames involved were in fact GameCube video frames, which do not align with Game Boy Advance video frames: approximately 59.94 frames per second on the GameCube, versus 59.73 frames per second on the Game Boy Advance. After doing some research online, I discovered that the Game Boy Player does not do any fancy synchronization and just adds frames where it needs to. This, combined with the lack of a good way to detect GBA frame boundaries, was enough for me to say that the JOY bus approach was not going to work, and I had to take another approach.

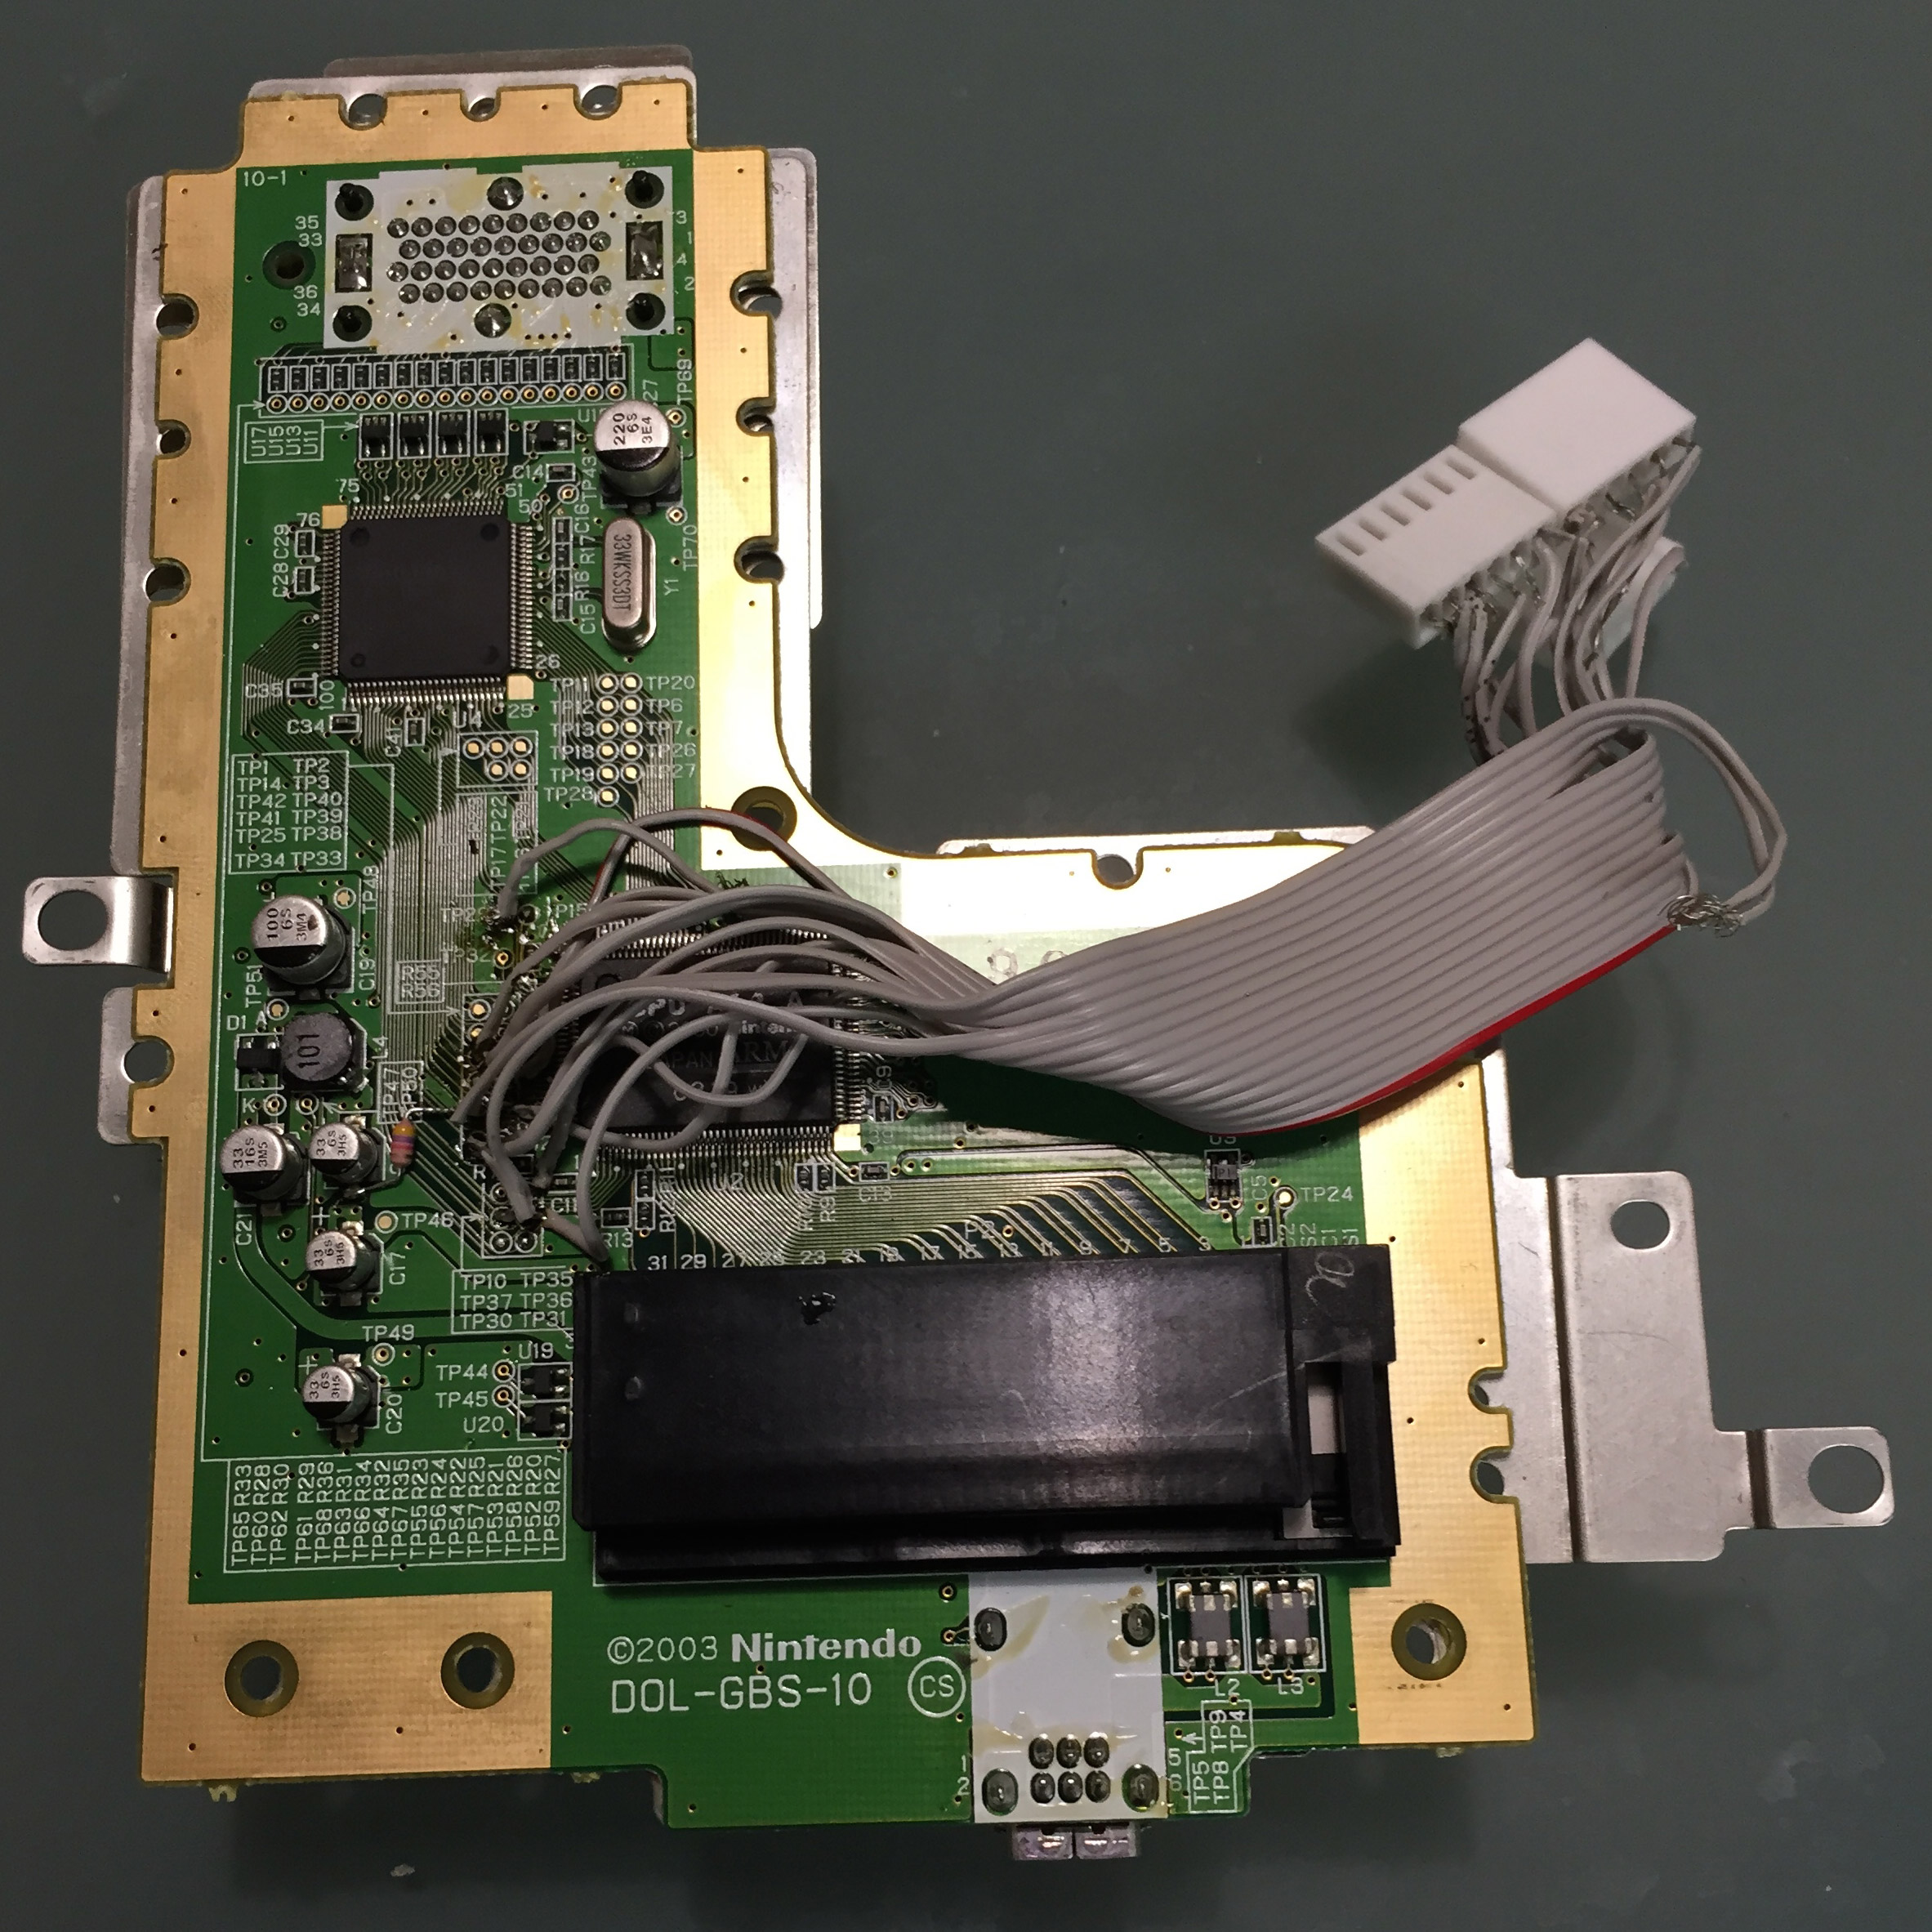
The other approach I took was a bit more drastic. I found some photos of the Game Boy Player board online. It appeared that the Game Boy Player used a stock CPU AGB A chip, the very same chip as in the original model of Game Boy Advance, along with a custom chip labeled GBS-DOL that bridges the High Speed Port on the bottom of the Game Cube and the CPU AGB A’s signals. I also discovered that there are a huge number (roughly 60) of test points. Upon closer investigation, I realized that test points 33 through 42 map directly to the keypad input on the CPU AGB A. Tapping these test points allowed me to directly control the key input on the Game Boy Player. There were also exposed test points for the SPS signal, which is used for the LCD to reset the row counter (effectively the same as a vsync signal on older displays), and for the Reset pin on the CPU AGB A. I soldered wires to these test points and connected them to a Teensy 3.1. Testing this with a little program I wrote for streaming controller data from an attached Wii U Pro controller to the Teensy proved to let me play Game Boy Advance games with an external control source, even without the GameCube controller attached. The mapping of pins I used is below:
| Teensy Pin | GBA key | TP | Name |
| GND | - | GND | Ground |
| 0 | - | 29 | SPS (Vsync) |
| 1 | 9 | 40 | L |
| 2 | 6 | 42 | Up |
| 3 | 5 | 39 | Left |
| 4 | 7 | 41 | Down |
| 5 | 4 | 38 | Right |
| 6 | 2 | 33 | Select |
| 7 | 3 | 34 | Start |
| 8 | 8 | 35 | R |
| 9 | 1 | 36 | B |
| 10 | 0 | 37 | A |
| 14 | - | 25 | Reset |
Next up was a bit more interesting. Since I’d tapped the SPS pin, I was able to get frame-accurate input, and since I’d tapped the Reset pin, I was able to get an accurate frame count from startup time. So what does one do with frame-accurate timing? Well, console verification of course! At first, results were a bit less than encouraging, though. Only one game that I tried synced at all, and only for about a minute. Ironically, this game does not sync at all in the most recent version of VBA-rerecording.
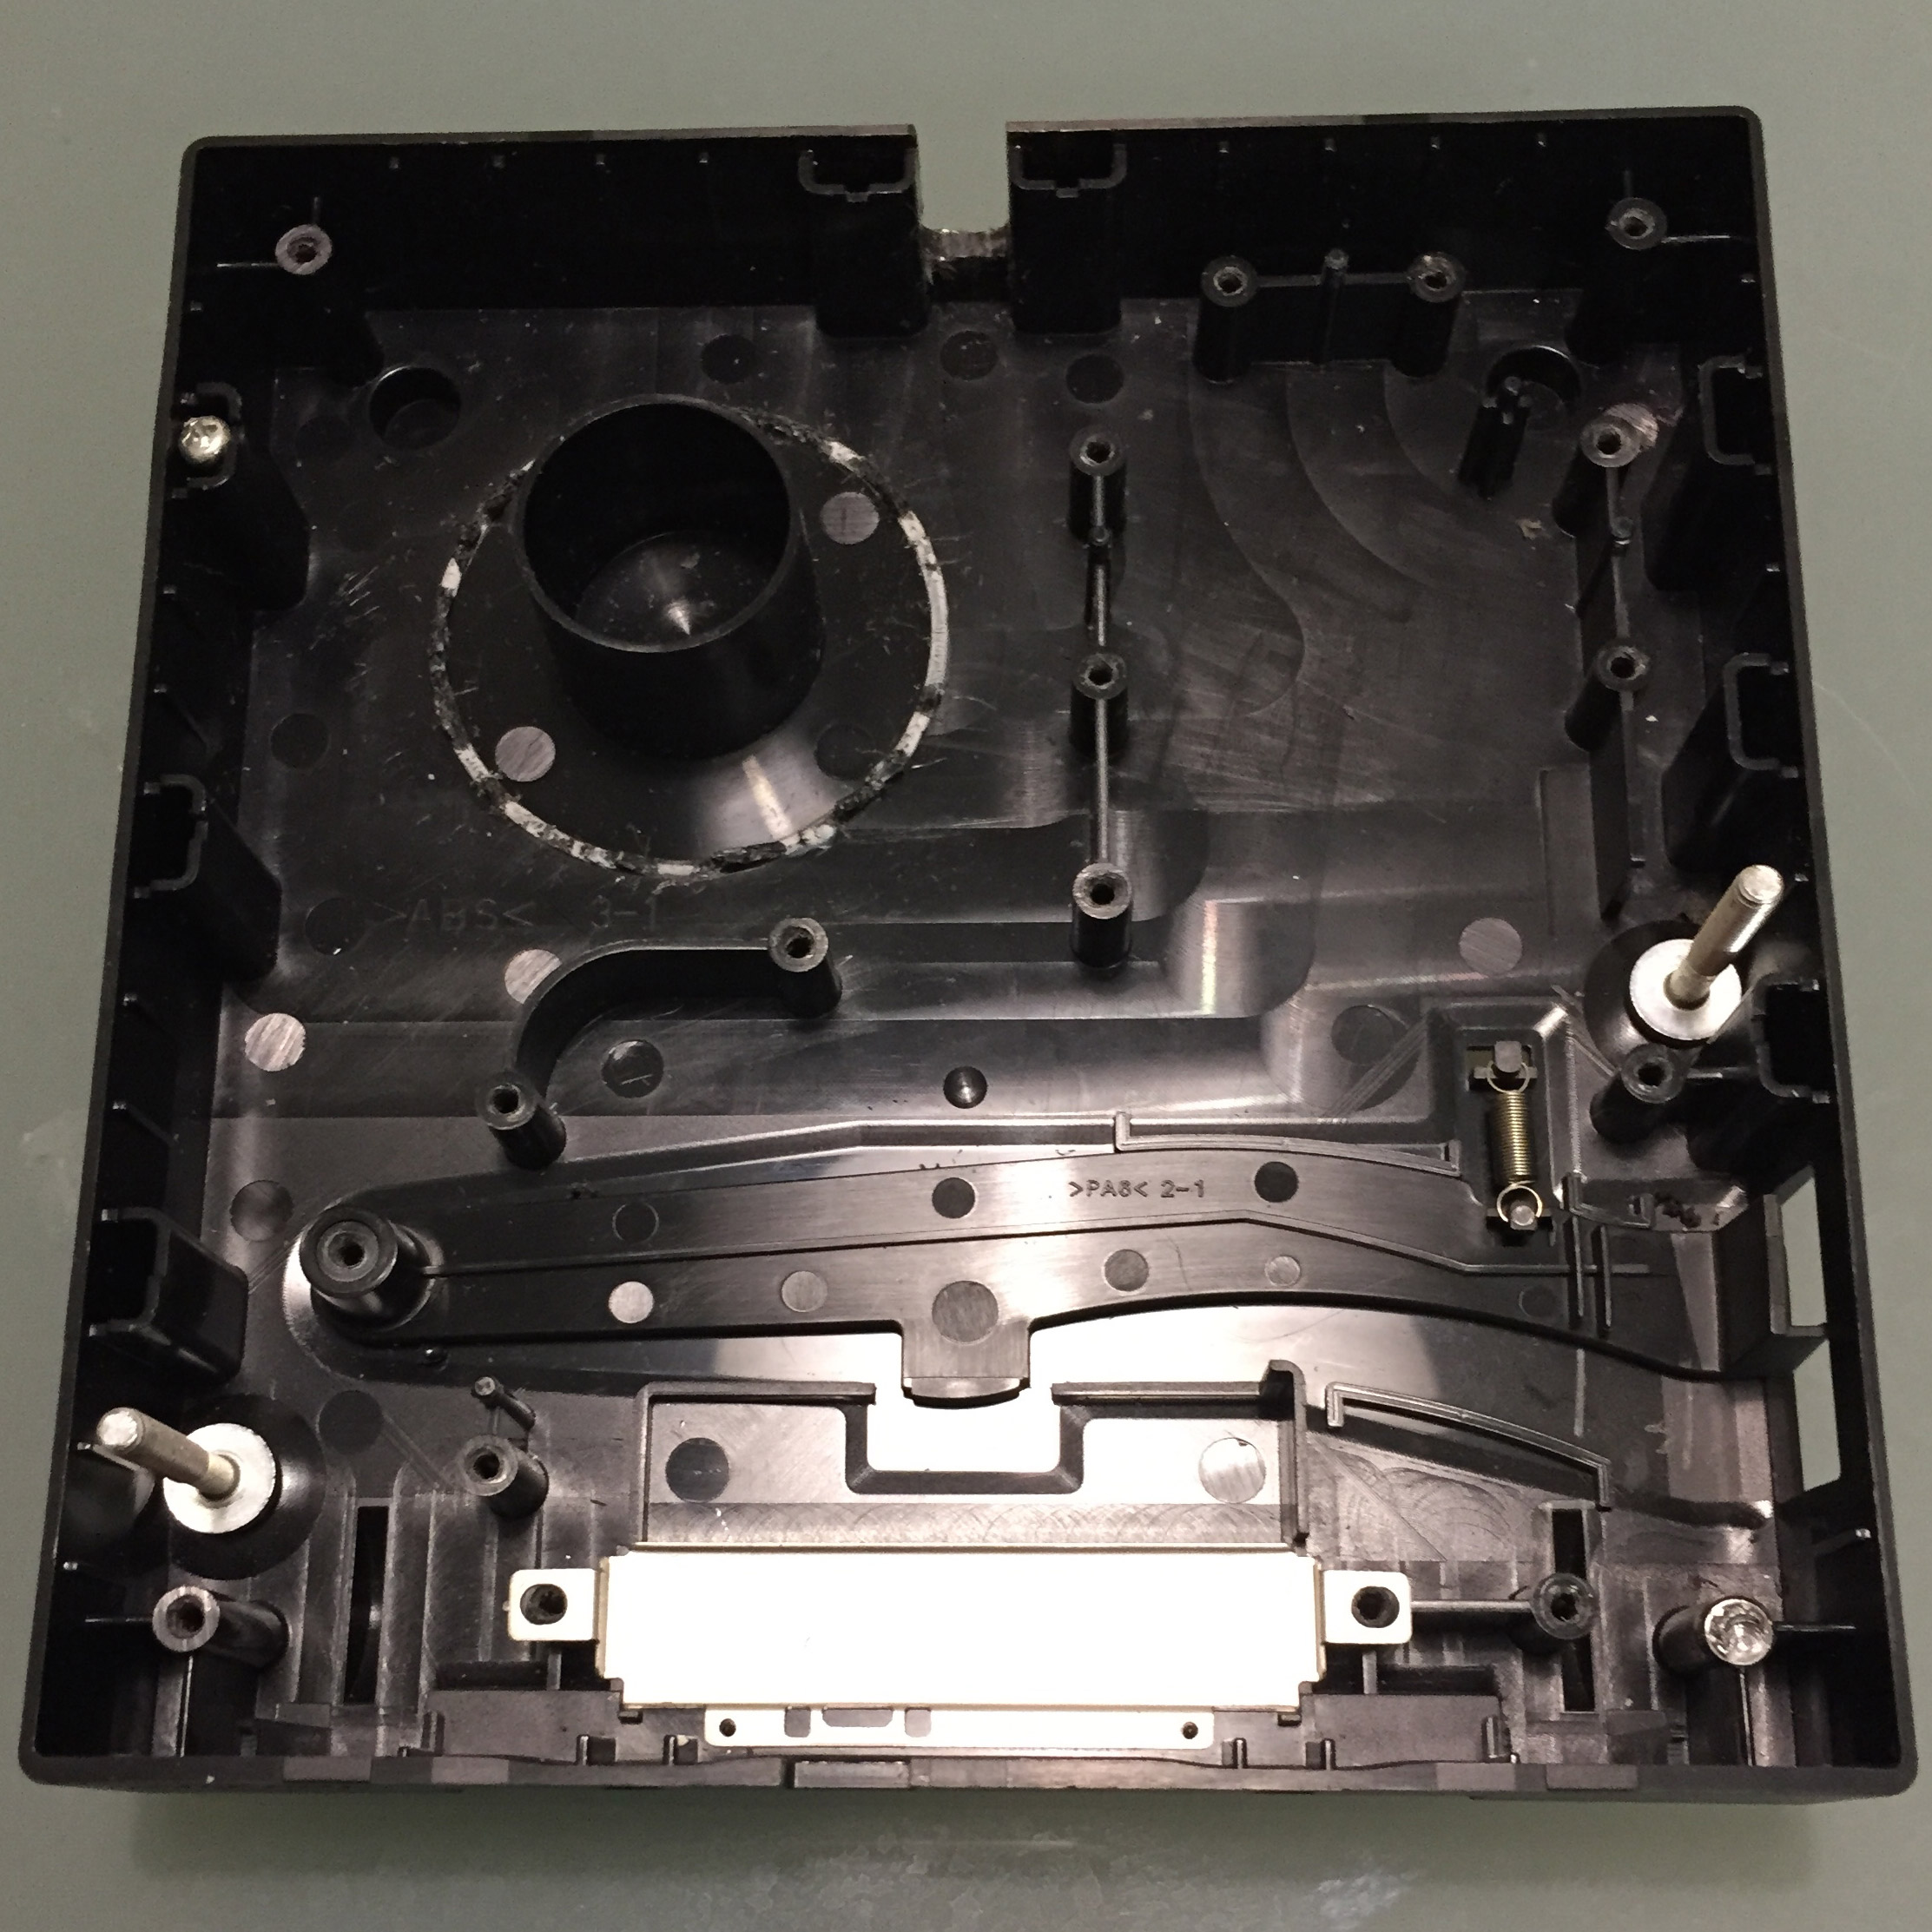
I figured that at this point, all the issues would be in software, either in the program I was uploading to the Teensy, or in the recordings from VBA-rr. After all, I had frame-perfect sync on the hardware side. I decided to put the whole thing back together into a nice casing. As it turns out, the Game Boy Player’s case has a lot of free space inside of it, although there are two concentric circles of plastic that are presumably there for support. The second one seemed a bit redundant, and removing it gave me plenty of room to put the Teensy and some wires, plus a USB dongle to allow an external USB cable to be attached to the Teensy. Assembling it took some time, but in the end the results were quite good. This was my first foray into hardware modifications at all, so the soldering job is a bit shoddy, but it works. Thus was born the Game Boy Player Player!


More recently, I dug up a recording that I hadn’t tried before: an Amy-only speedrun of Sonic Advance 1, and at first this seemed to sync somewhat okay as well.
I figured with some polish, I could get even better results, so I spent a few hours over the weekend cleaning up the recording to match the actual console’s timing, and got a solid 200 seconds of gameplay synchronizing, which included the first three stages and a bit of the fourth. Using a little bit of ingenuity, I’ve since managed to get it to sync perfectly for over six minutes, at which point differences in timing cause a random boss to behave differently. It’s taken some time, but now I’m confident that, with proper estimation of lag frames, console verification of Game Boy Advance games using the Game Boy Player Player should be possible!
Source code for the Game Boy Player Player project is on GitHub in the gbpp repository and in-progress verifications are in the gba-verify repository.